back to the top
Replacing a Siemens dishwasher’s pump
We’ve recently moved to a house with a 12 year old kitchen. That means all the appliances are nearing their expected end-of-life, and start to show little defects. In this case: our dishwasher.
Error and diagnose
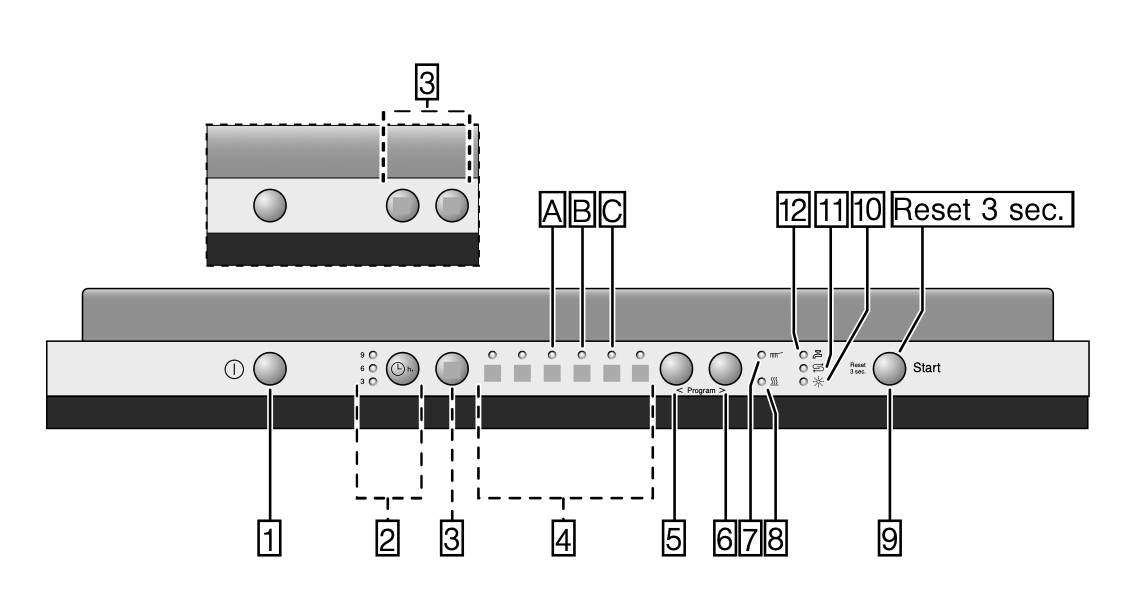
We have a Siemens dishwasher; model SX65E009EU/65. On a random Tuesday morning, the machine suddenly showed a blinking error light after cleaning the dishes. The instruction manual labelled this indicator “Check water supply” [12].
The ‘Fault table’ specifies the following:
| … | … | … |
| Display “Check water supply” [12] flashes. | A technical fault has probably occurred. | Switch off appliances with the ON/OFF switch [1]. After a short time restart the appliance. If the problem recurs, turn off the tap, pull out the mains plug and call customer service. |
| … | … | … |
Doing as I am told, I called Siemens customer service. After a somewhat confusing back-and-forth about intake volumes and a calcified tap, the customer service representative concluded that the error was caused by a leak — supposedly either the lining was leaking, or there was an internal leak in the circulation pump. A mechanic could come by, but the visit would start at €119, add €60 for their time and €40 for parts for an easy fix, or €150 for a new pump. The representative suggested to reconsider, especially considering the machine’s age.
Instead, we asked a local appliance repair shop; for €50 they would come in and have a look. They quickly narrowed it down: the machine ran fine and did not trip the leak detector, but it did not heat up at all. It was safe for us to use in the mean time — be it somewhat inefficient. Unfortunately, this particular machine heats its water inside its circulation pump. Quoting us €189 for parts and another €50 for the repair, we were left to consider our options.
DIY
At this point we could have cut our losses and bought a new machine. As the machine worked fine, though, we had some time to think it over. Researching the issue, I found a YouTube video by Schraub Doc explaining in very clear (German) instructions how to replace the pump on a similar machine. In a montage taking only 5 minutes to replace it and put it back together, it suddenly looked very doable!
Parts
Intrigued, I scoured the spec sheets (readily available on the Siemens website) to find the correct part.
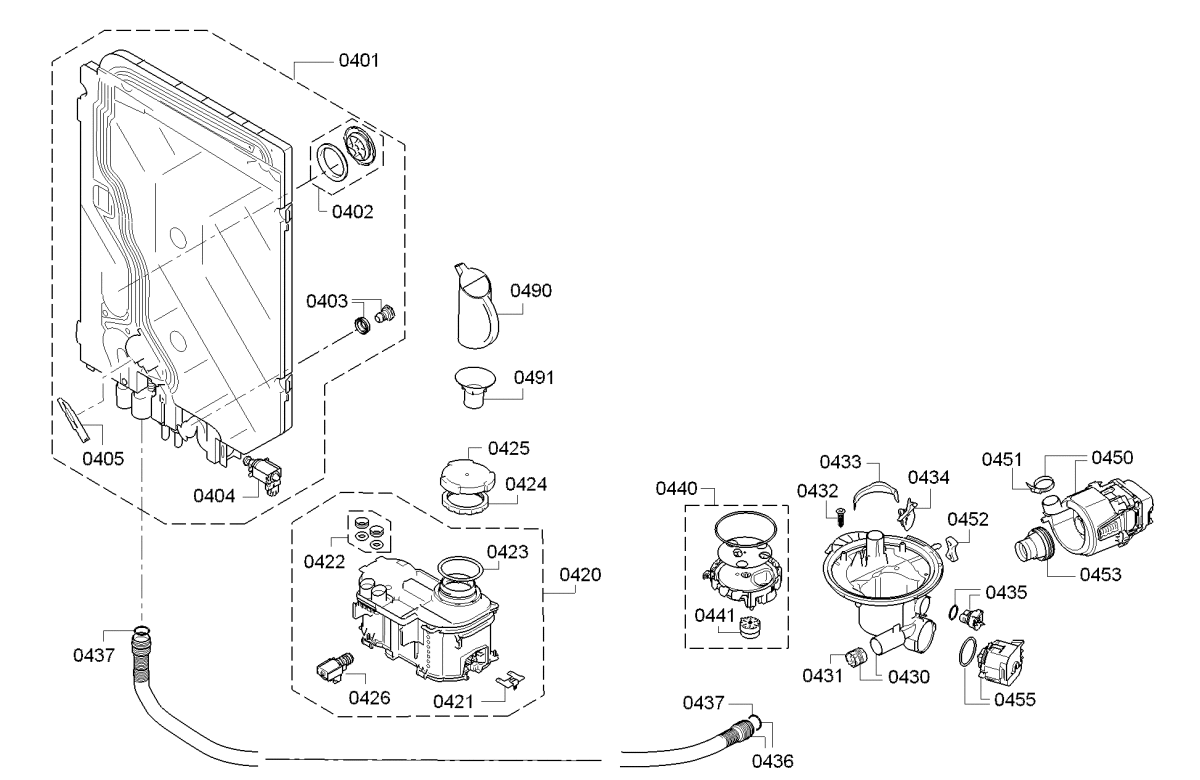
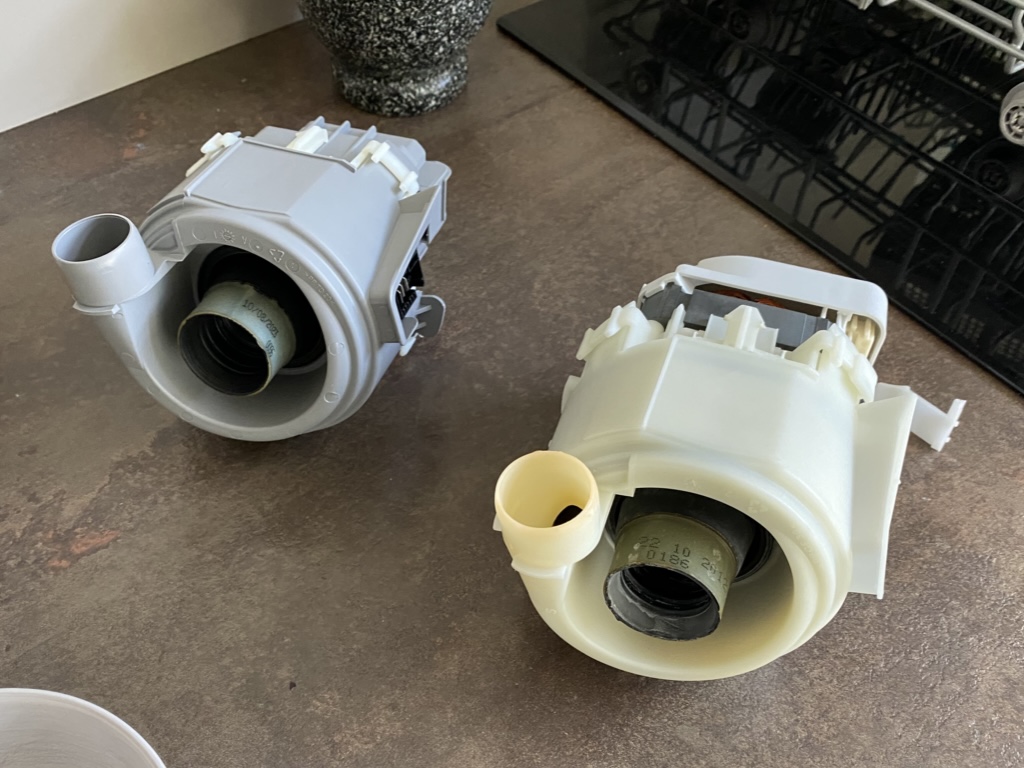
The overview lists 00651956 as the product code for part 0450; the circulation pump with integrated heating. Searching online led me to various part shops selling pumps that looked similar or identical, claiming they were a compatible replacement for part 00651956. Some had a slightly different connectors, requiring some soldering or liberally applied electrical tape. At 220V tucked away in our kitchen, I wanted the proper part.
To my surprise the pump was readily available in the Siemens webshop for €152 (among countless other spare parts). With a first-timer discount, I paid €137. At this point it was not about the money anymore, of course.
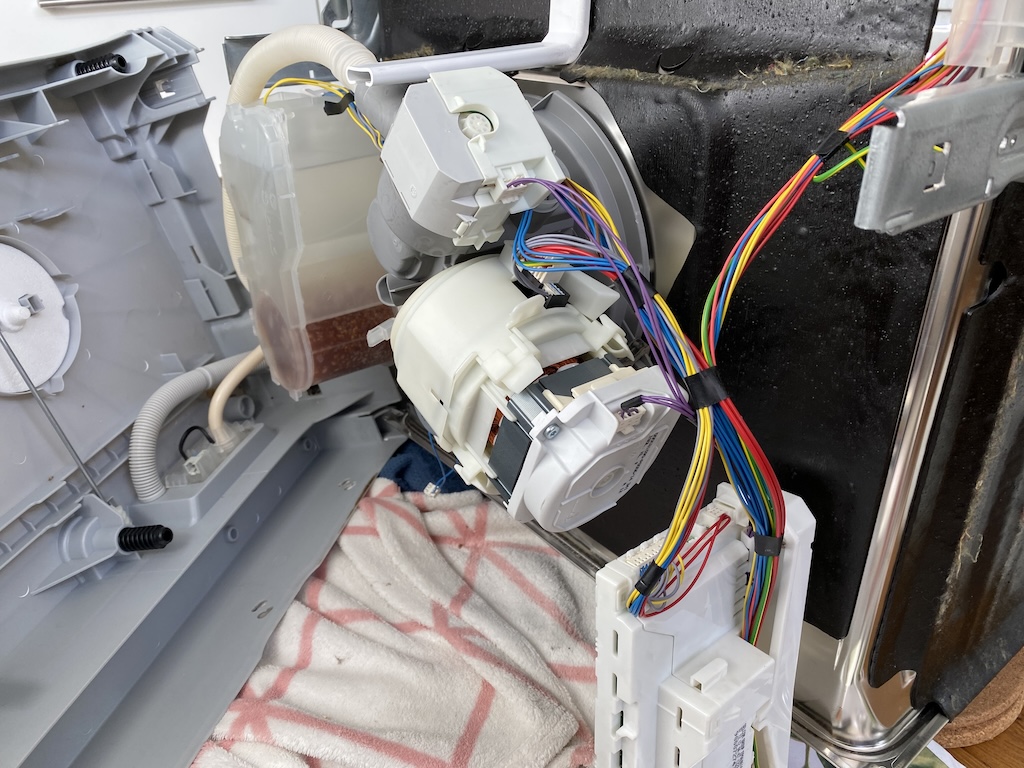
Replacing the pump
Rather than repeating the excellent explanation provided by Schraub Doc on YouTube and in an article on their website, I’ll just address a few key points and differences. I’ll mention the timestamps corresponding to the events in the YouTube video.
Throughout the replacement process, I used:
- a large flathead screwdriver,
- a Torx-20 screwdriver,
- a Philips PH2 screwdriver,
- and a pair of combination pliers.
To lower the machine from underneath the kitchen counter, I used a 18mm wrench to twist in its retractable feet. Note that the manual specifies a 17mm wrench — your plastic may vary.
-
[0:32-0:54] The side panels are slightly different across different models. For my machine, there was only a single Torx-20 screw holding each panel in place, and they did not cover the entire side. There were also no horizontal spacers present. This should not lead to much difficulty; simply make sure to take a picture for easier re-assembly.
-
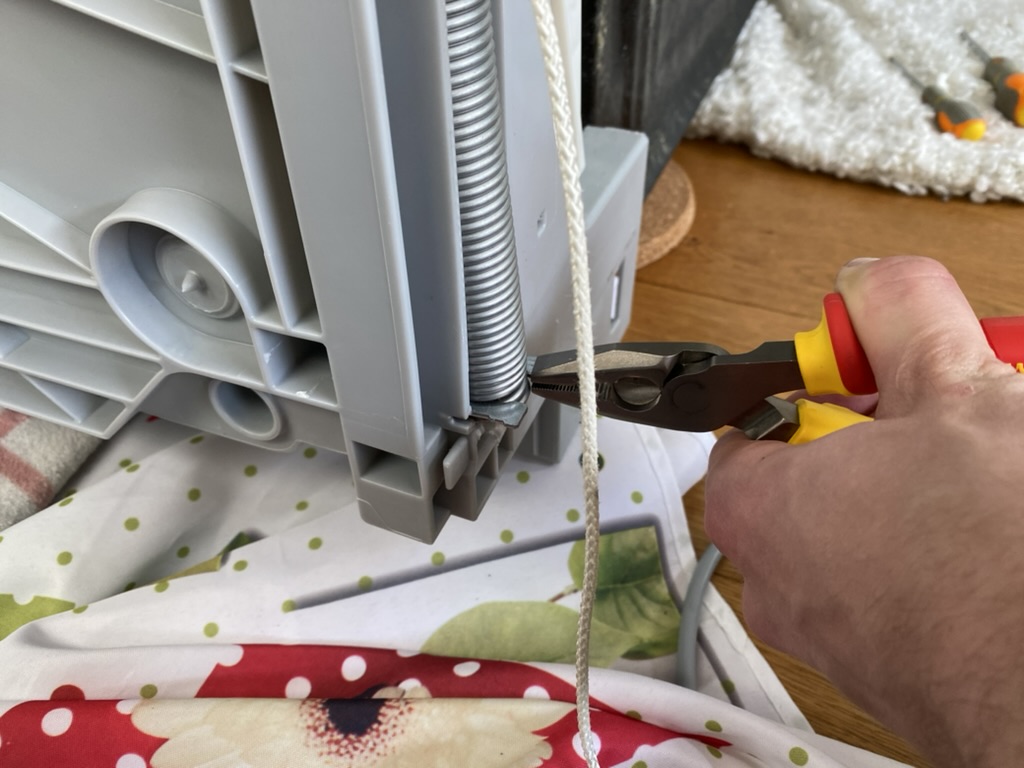
[0:54-1:08] Rather than disengaging the springs that hold the door in place by pulling on the string and undoing the hook, use a pair of pliers to pull out the base from its holder while you disengage the spring slightly. This takes significantly less force. When re-assembling [4:22-4:37], first route the string and then slide the spring back in while applying some pressure.
- [1:15-1:22] I did not fully remove the plastic cap from the bottom panel, as it was quite firmly attached. Instead, I unplugged the ‘Aquastop’ by reaching into the bottom panel from the side. I undid a hook that held the blue and brown cable in place to create some more working room. In retrospect and considering the next step, perhaps unplugging this cable was not even necessary.
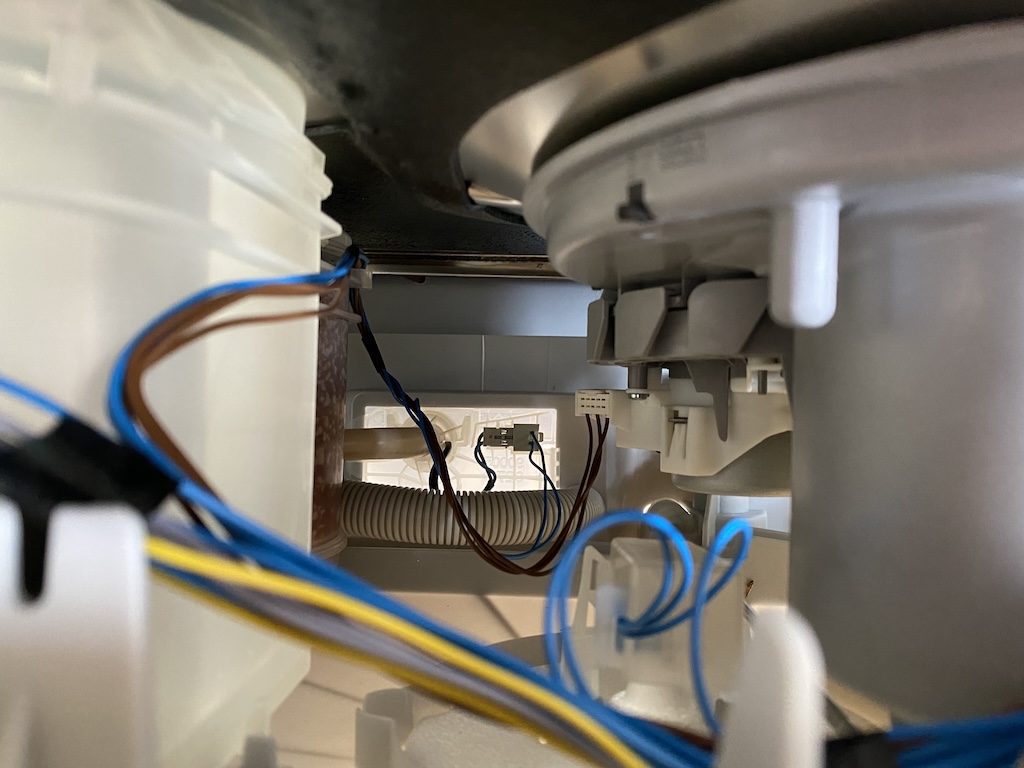
- [1:22-1:35] Initially I tried to undo the hose, but as Schraub Doc remarks: “Bitte aufpassen, denn das kann mitunter richtig schwer sein!” After 15 minutes of fiddling, I gave up and accepted that I would keep the base plate attached slightly, hinging it open. This created plenty of working room for the next steps. Make sure to support the base plate so that the hose is not stressed.
- [1:42-1:46] In addition to the clips at the front (i.e., the top, when lying the machine on its back), my machine had bent metal clips at the back. I had to straighten them out using pliers.
- [2:22-2:26] I opened the metal hose clip by pressing a flathead screwdriver into the opening, and twisting it open. It should come undone easily, without risking damage to the hose.

Testing if it works
With the pump installed and the machine back on its feet, I connected the water supply, power cord and drainage hose. Planning to do a test run before wiggling it back underneath the kitchen counter, I pressed ‘On’. To my dismay, the dishwasher let out its signature beep but the LEDs stayed dark. Turning it back off triggered a familiar signal, but resetting it did no good either.
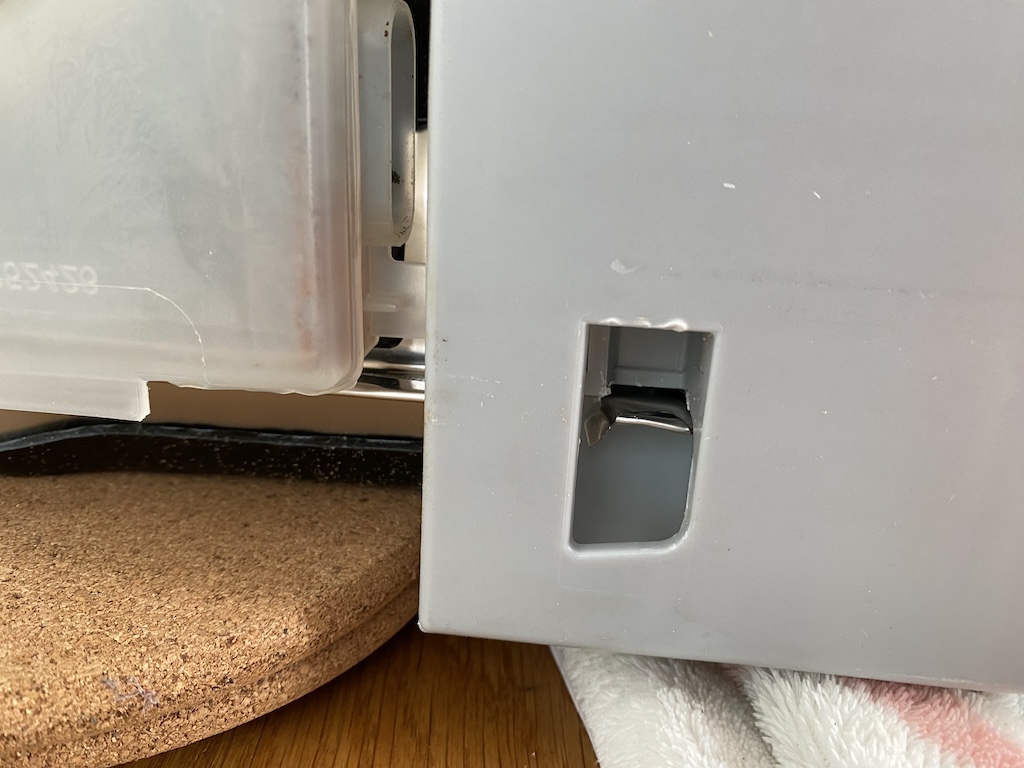
In retrospect, this is where I veered off the path. Assuming I had somehow unplugged a cable (or worse: damaged the electronics), I set out to disassemble the machine again. I found no sign of damage anywhere, but did stumble upon the leak detector unit (‘Bodenschwimmer’, [1:36-1:41]). Pressing down on the little switch did trigger the pump to attempt to drain the machine, so at least there was some life to it all.
After thoroughly confusing myself with regards to the workings of the leakage detector and its floating styrofoam (which, of course, floats up to press the button in case of a leak) and a brief detour where I reattached the old pump (with identical results), I left the machine to rest for the night.

The next morning, while already mournfully scrolling through listings for new machines, I came to a crucial realization. What if the buttons did not work because the door was not open? As the machine was standing freely in the middle of our kitchen, free of any obstructive cupboards or counters, I was trying to turn it on with the door closed — I could simply reach the buttons on top of the machine. Sure enough, opening the door before turning it on made it spring to life. Hooray!
After reinstalling the machine and adjusting its height, it is washing dishes as if nothing ever happened.